mBlock Extension:
Ethernet Shield (ver. 0.0.3)
Extension for Ethernet-Shield (Ethernet Shield allows an Arduino board to connect to the internet). This extension is designed to work with the Arduino Ethernet Shield and any other W5100/W5200/W5500-based devices. The extension allows an Arduino board to connect to the Internet. The extension contains blocks for creating a simple measurement server and a simple web client. The extension is mainly intended for Arduino UNO and Leonardo. The functions for controlling the SD card, which is located on the Shield, are not included in this extension.
- Simultaneous use of Ethernet functions and SD card is impossible on Arduino UNO due to lack of memory, so we focused only on Ethernet functions.
Version 0.0.3 increases the efficiency of packet transmission and thus reduces the response time for the server. Server texts can also be used with our extension Texts to Flash.
Ethernet Shield
- This block is used to set a unique physical network
MAC address. Each network device must have this address unique (change the default values!). Newer Arduino Ethernet Shields include a sticker with the device's MAC address. For older shields, choose your own. 
- This block sets the specified
IP addressand setPort. (Set the IP address according to the settings of your computer network.) 
- The first option is to set the
IP addressautomatically using a DHCP server 
- The second option is to set the
IP addressmanually to a fixed value. 
- This block allows you to display the local
IP address(useful in case of automatically obtaining an IP address from a DHCP server) 
Server (Before use, it is necessary to set the MAC and IP address – Ethernet shield category)
- This block starts the server at the above specified This block starts the server at the above specified IP address and sets the port
Port. 
- The statements enclosed in this block are executed only if a client is currently connecting to the server.

- This function returns a
GETrequest from the client (a text string containing the query including parameters). The function can be used ONLY if a client is connected, so it is necessary to use it inside the previous block "Is there a request from the CLIENT?". 
- The functionality for the
POSTmethod will be added in some future release! - Block for sending a response to the client. The response is built using the following "
Line of Response" blocks. This block is typically used twice in a standard HTTP response. The first block is used to send the status header (status: OK, Forbidden, Not Found…; Content-Type: text, HTML, XML… etc.), the second for the body of the message or web page. This block can also be used ONLY INSIDE the "Is there a request from the CLIENT?". 
- It is possible to enter individual response lines for the client in this block. Each line is automatically terminated by
CRandLF. It is NECESSARY to use it inside the previous block "SEND response to CLIENT". 
Client (Before use, it is necessary to set the MAC and IP address – Ethernet shield category)
- This block connects to the specified server and sends the required request. (it is also possible to select the communication port)

- Block which allows you to test the condition that the connection was successful.

- The block returns first line of the server response (it include response status –
200 OK,404 Not Found, etc.) 
- The block returns up to 512 first characters of the server whole response (including the whole header)

Example (Server):
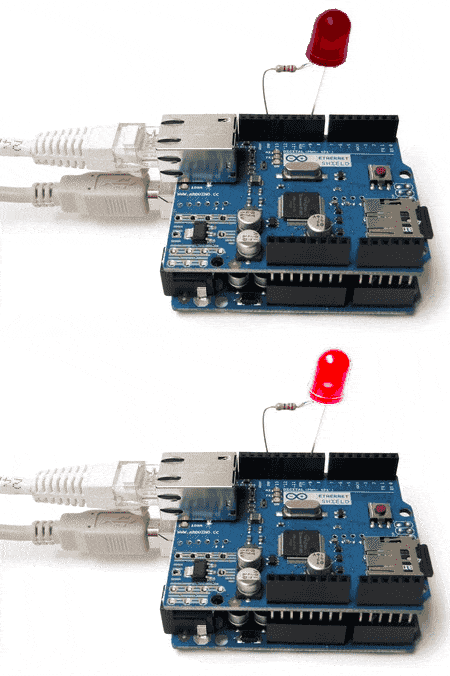
As an example, we will show remote switching on and off of LED via the Internet. Connect the Ethernet Shield to the arduino module. Connect the LED with the auxiliary resistor between the GND and digital pin 9. (See Fig. - Ethernet Shield is not drawn).
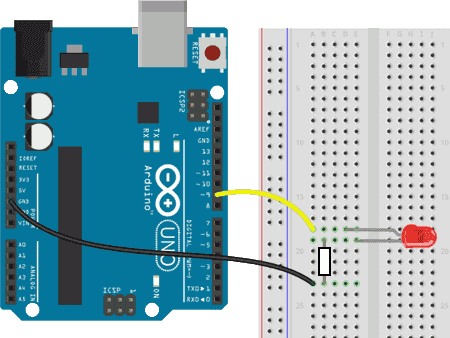
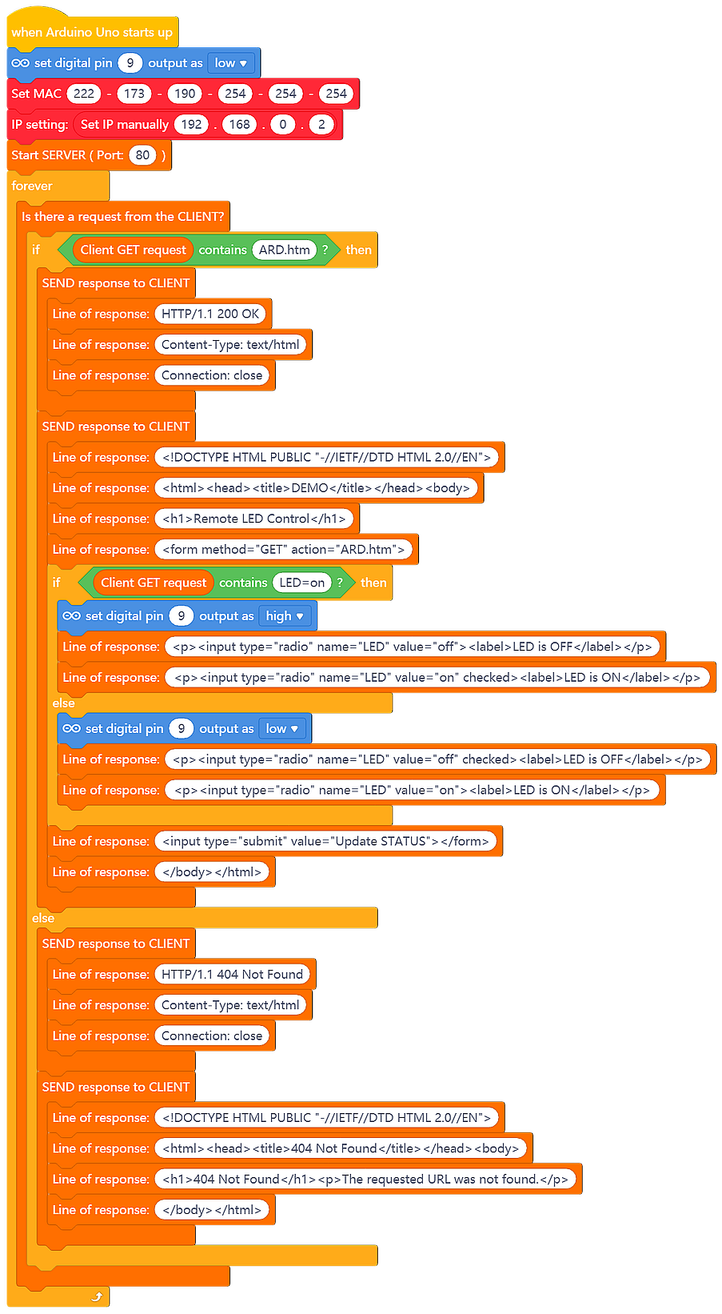
The following code shows a simple control server program. Connect the Arduino module to the test PC using an Ethernet Shield and LAN cable. The test PC and the Arduino module must be in the same network (identical first part of the IP addresses). The IP address of the Arduino module is set to 192.168.0.2 in the code. The setting of the IP address on the PC is usually mediated automatically by setting the network to which the PC is connected. For our test, we will set the IP address with the PC permanently – for example to 192.168.0.1.
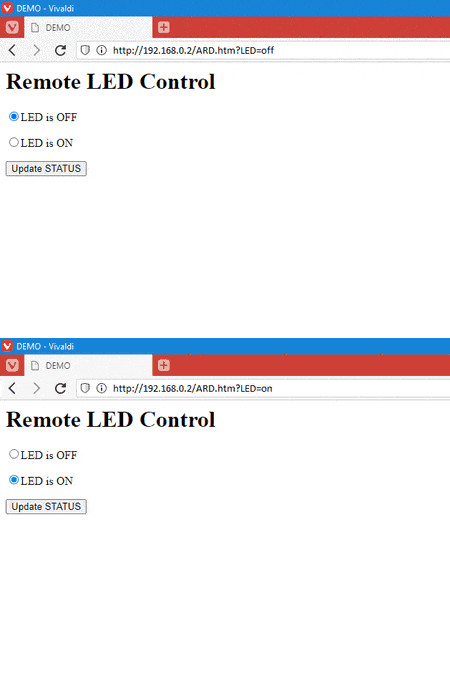
Enter the URL: http://192.168.0.2/ARD.htm in your internet browser. This loads the control HTML page from the Arduino module. The loaded web page contains two radio buttons. The first button lights up the LED on pin 9, the second button turns off the LED. The selection must be confirmed (sent) with the "Update STATUS" button! The code tests whether the GET query contains the parameter LED=on/off. Sets the status of the LED accordingly. If you enter a URL other than ARD.htm, the standard error "404 Not Found!" is returned.
And this is the real result!
Example (Client):
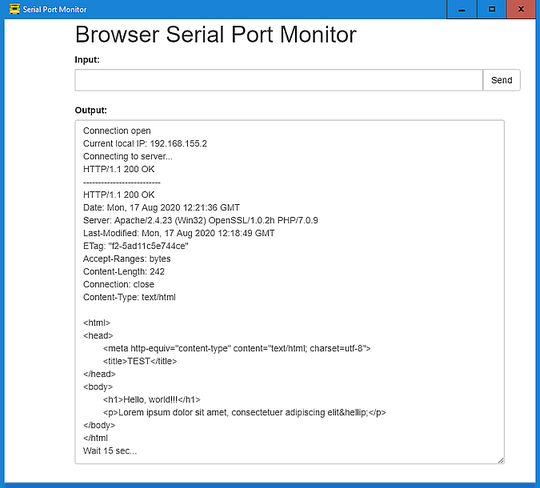
Connect the Arduino with Ethernet Shield to a computer with the IP address set to 192.168.0.1, on which you will start the web server. The files on the web server will be available for Arduino! In the following example, Arduino queries the index.htm file and writes its first 255 characters to the Serial port. Loading index.htm file is repeated at 15 second intervals.
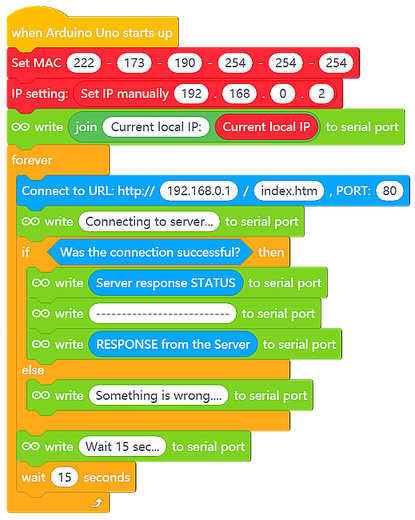
When connecting Ethernet Shield to a home/business network with Internet access, you can query remote files anywhere…
And this is the result!
